SSO with OneLogin
Introduction
This guide will take you through the steps required to perform integration of OneLogin with BMS.
Stage 1: Creating the app in OneLogin
- Log into OneLogin.
- Click Applications on the left panel and then click Add App.
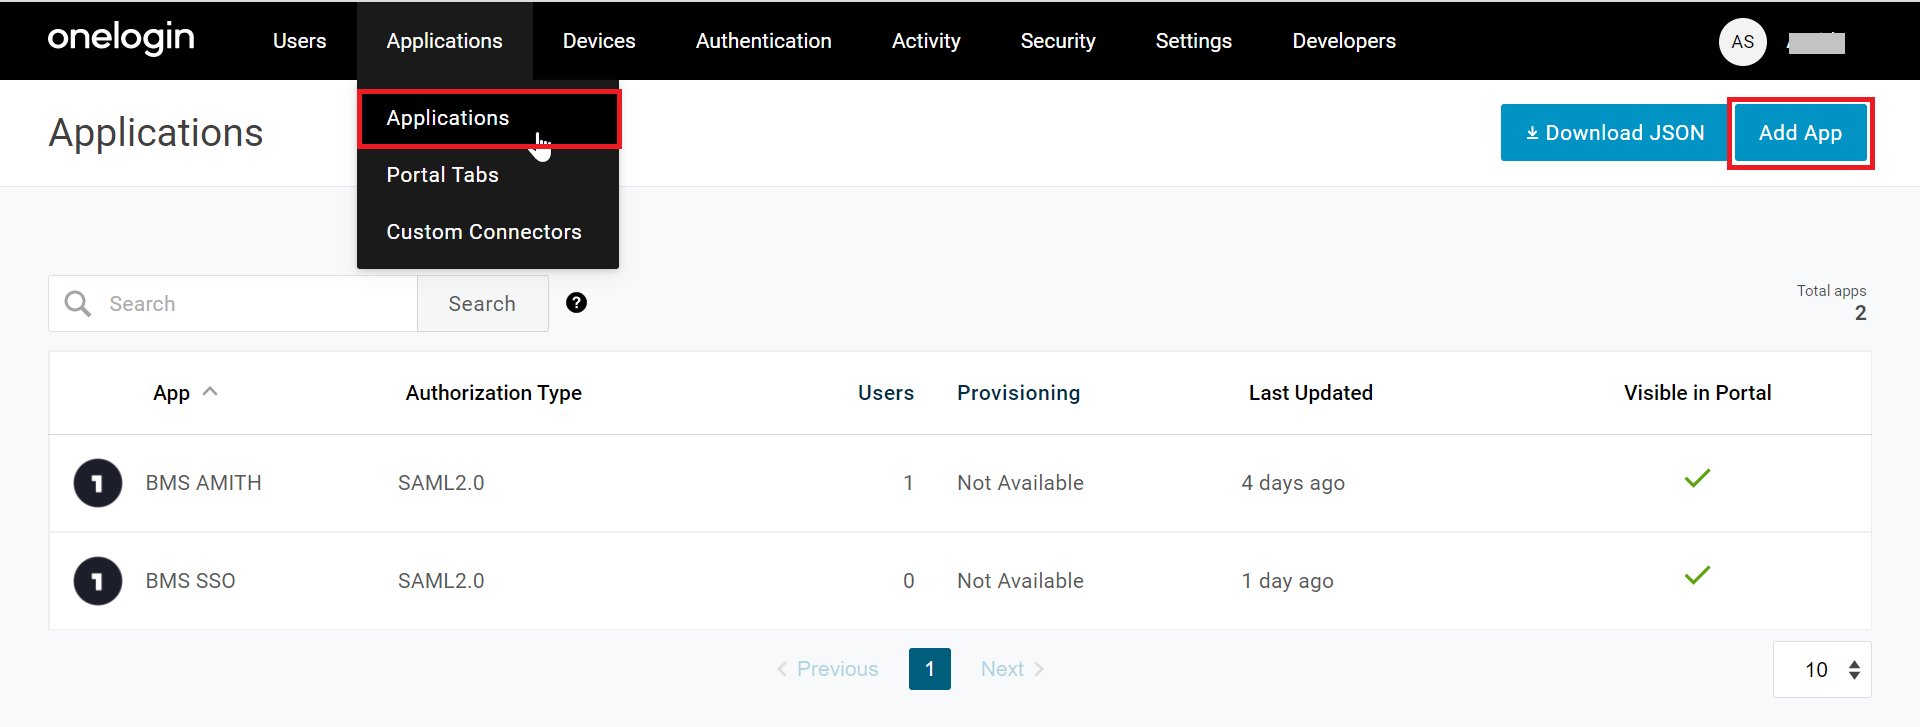
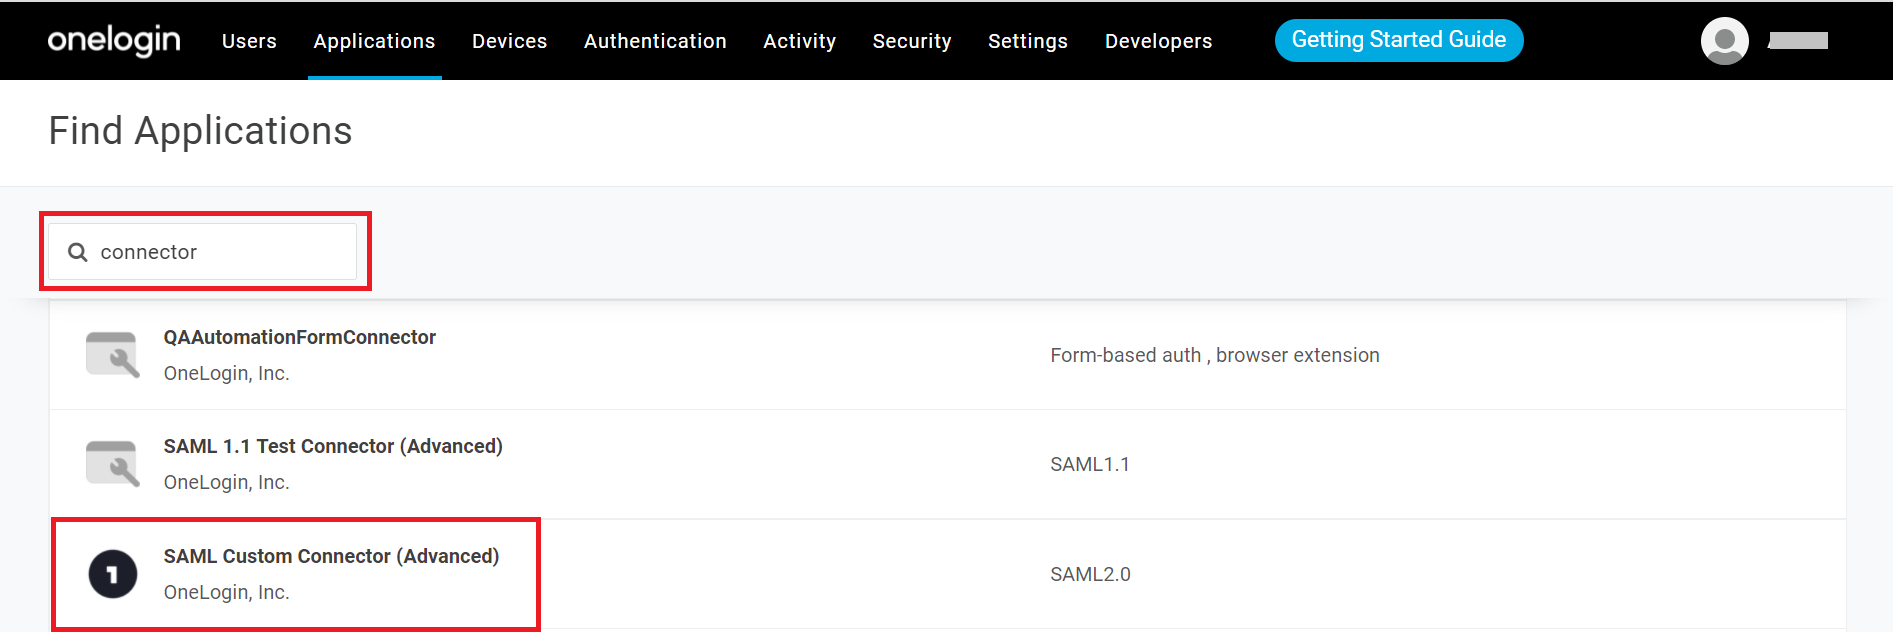
- Enter Connector in the Search field.
- Select SAML Custom Connector (Advanced).
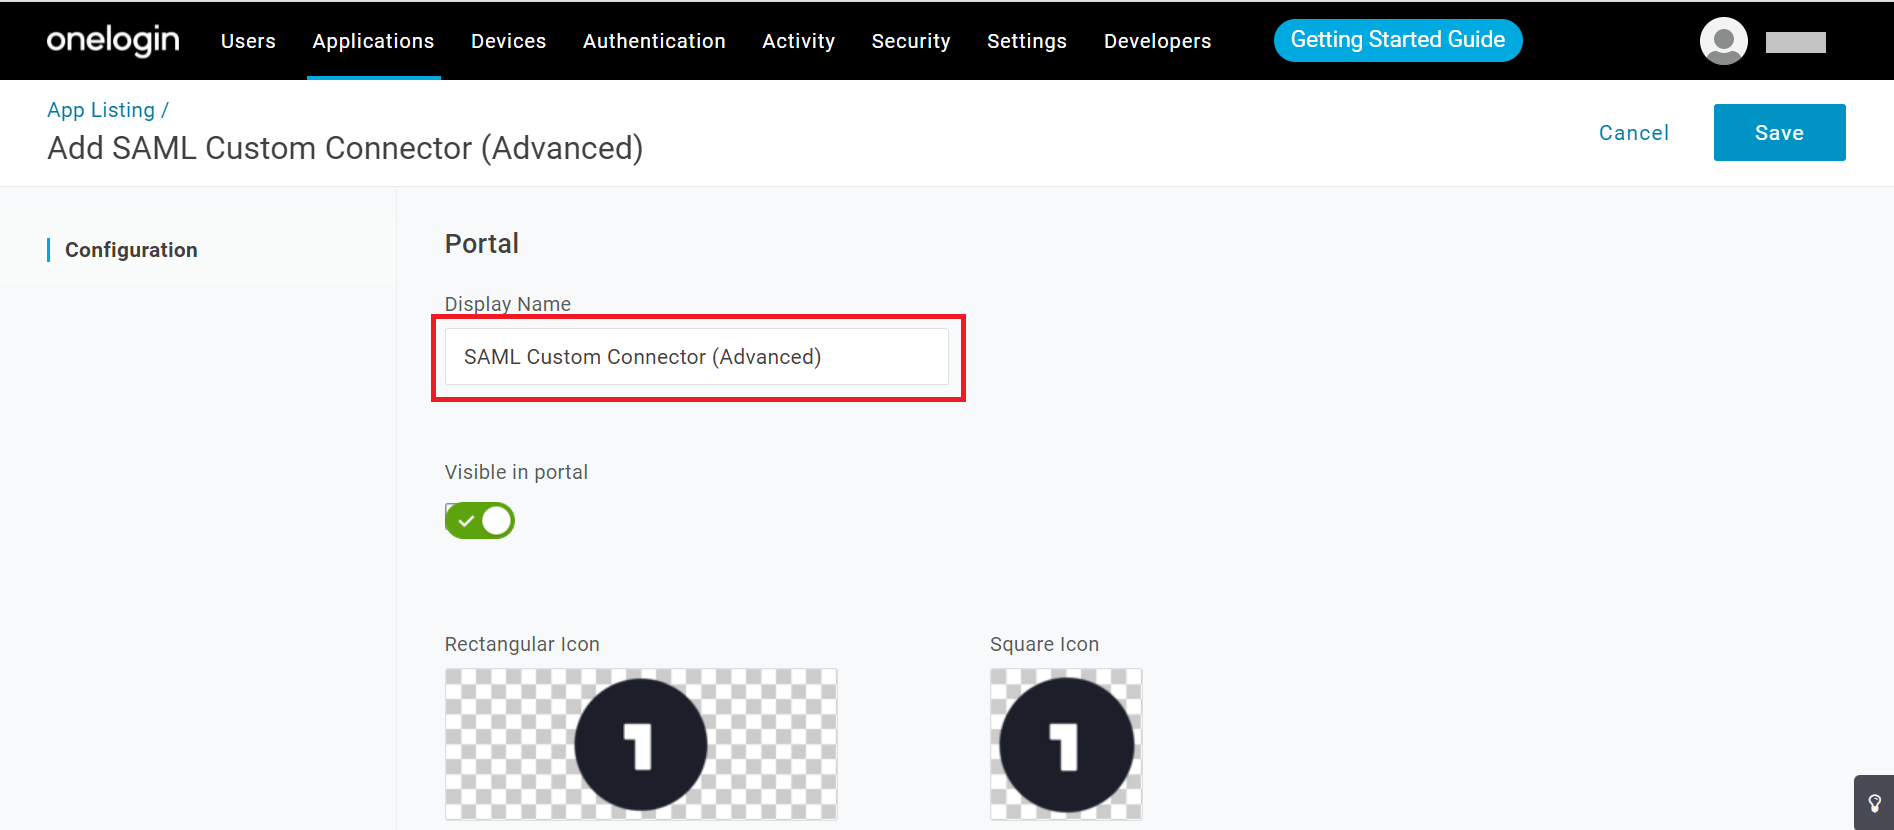
- You will need to configure SAML Custom Connector (Advanced). Enter a name in the Display Name field and save it.
Stage 2: Configuring the setup in the application
- Go to the Configurations page.
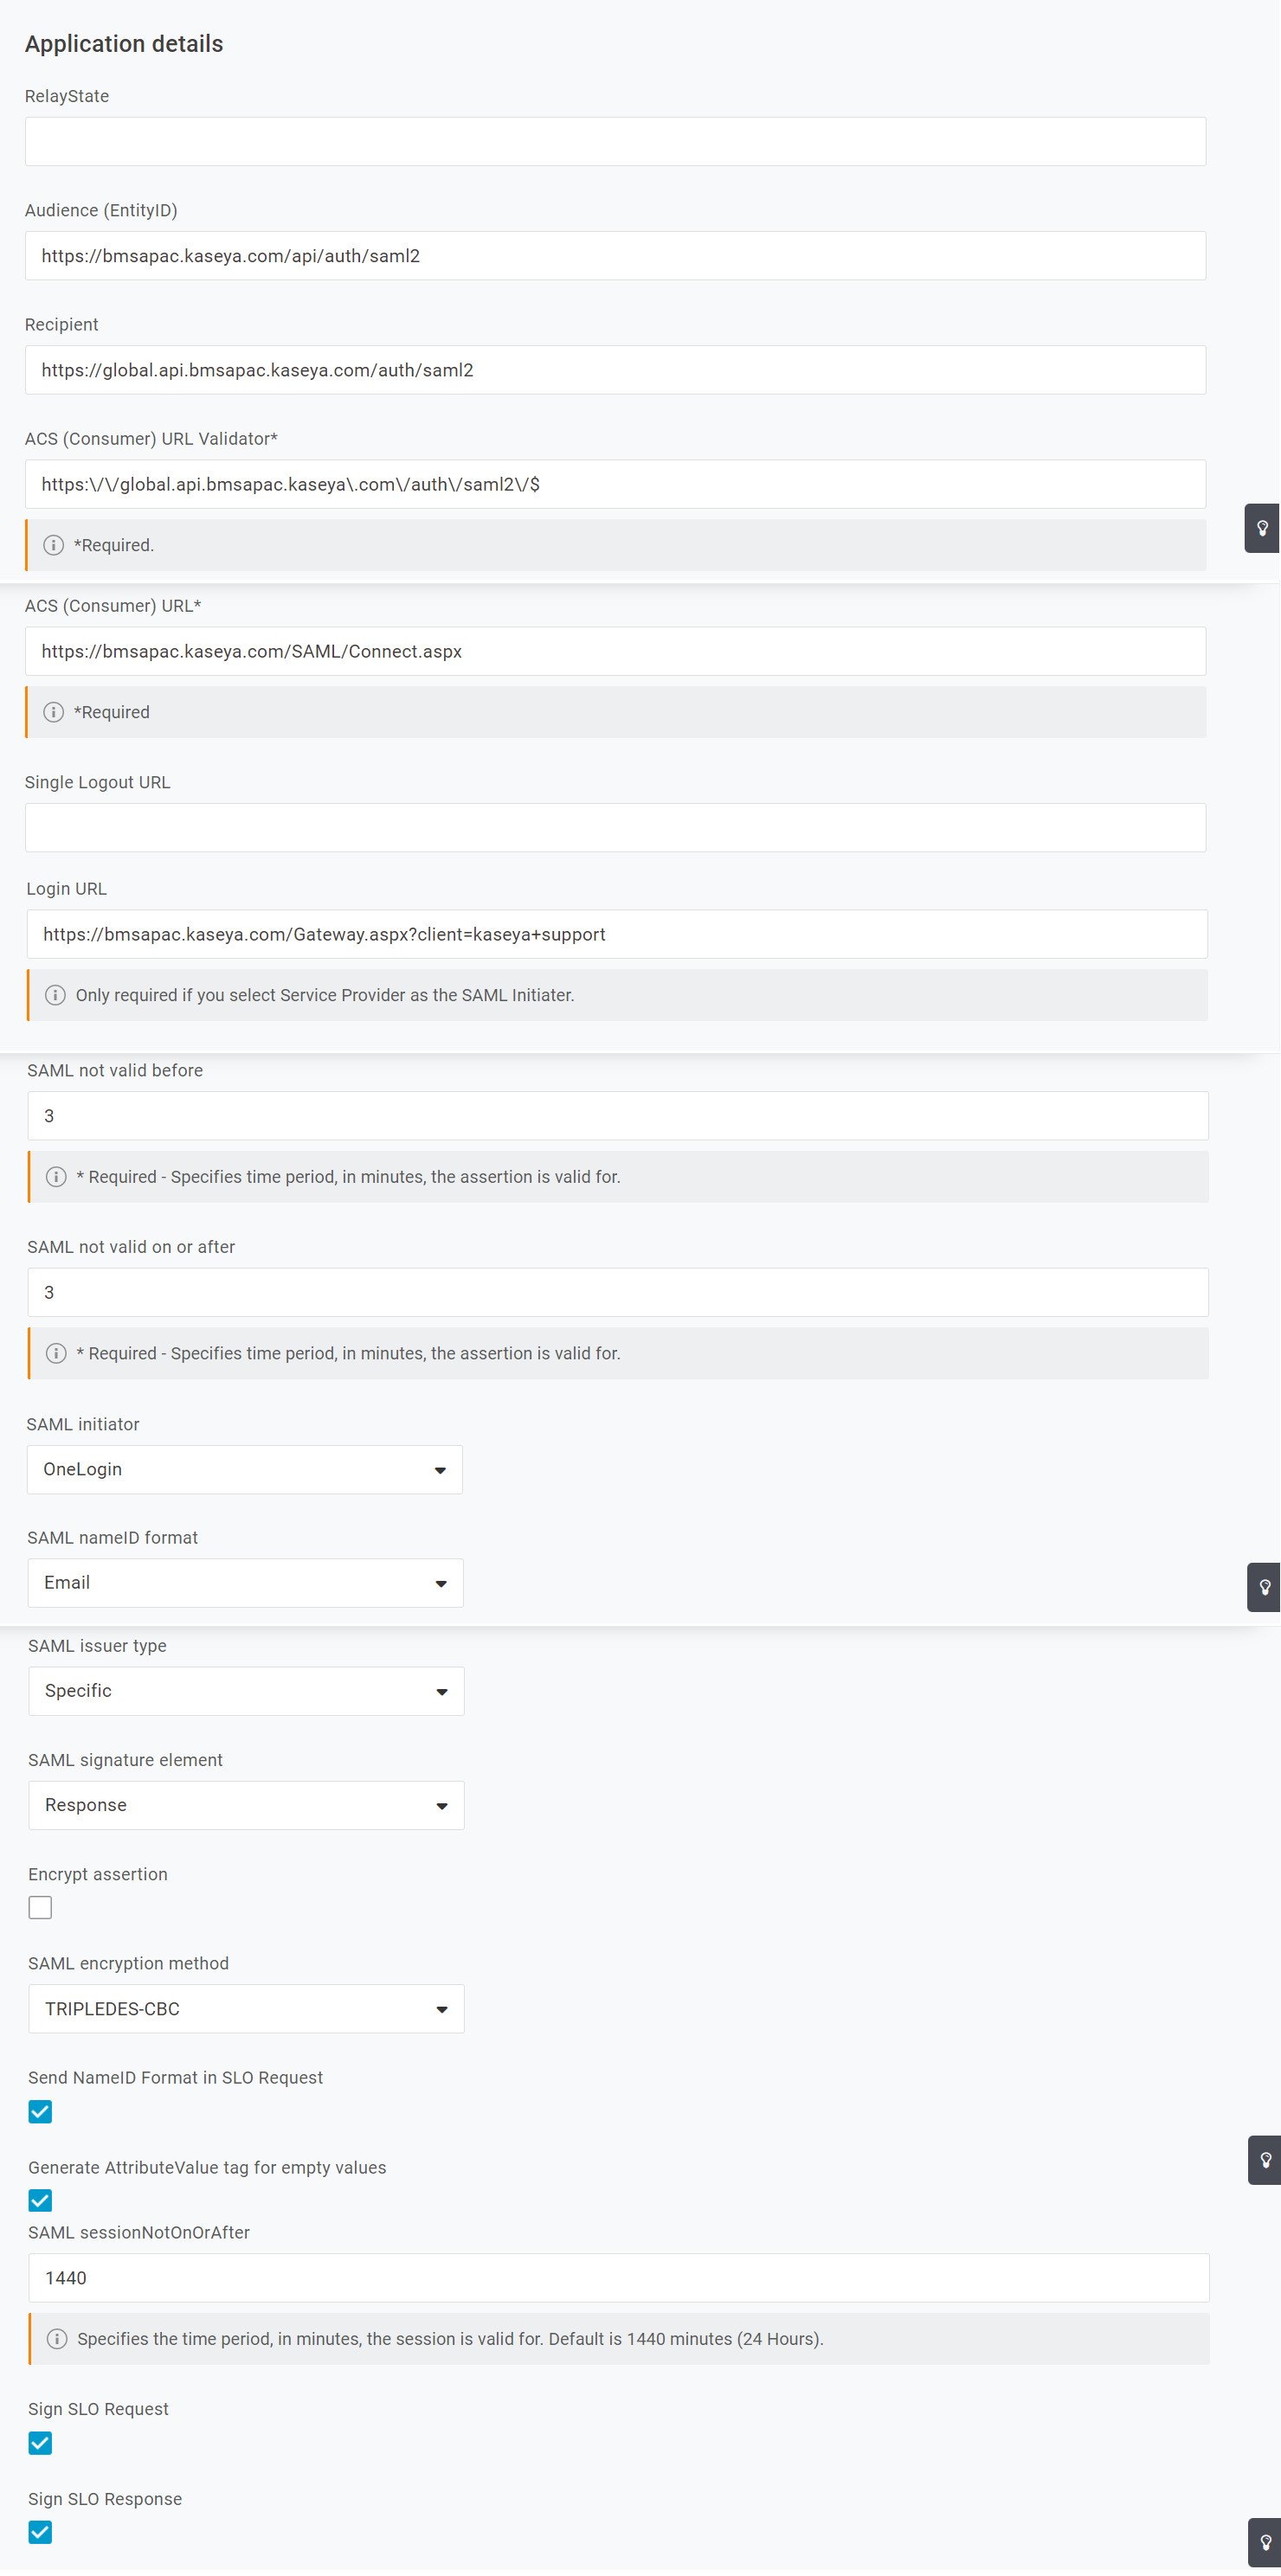
- Audience (Entity ID): Enter the entity ID in the format: https://<bms server>/api/auth/saml2
- Recipient: Enter the recipient address in the format: https://global.api.<bms server>/auth/saml2
- ACS (Consumer) URL Validator: Enter the ACS URL validator address in the format: https:\/\/global.api.<bms server>\.com\/auth\/saml2\/$
- ACS (Consumer) URL: Ener the ACS consumer URL in the format: https://<bms server>/SAML/Connect.aspx
- Single Logout URL: Leave this blank.
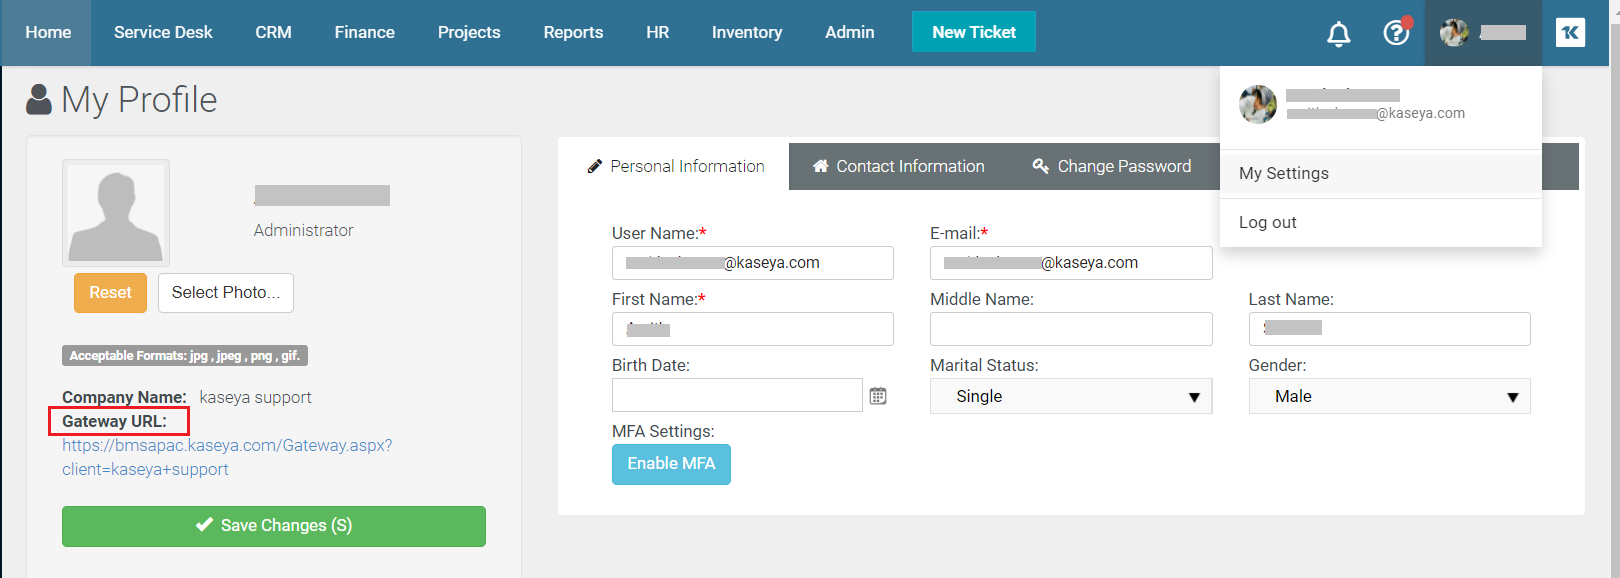
- Login URL: Enter the gateway URL (that you find under Your profile name > My Settings in BMS) in the format https://<bms server>/Gateway.aspx?client=<company name>. See the second image below.
- SAML not valid before: Enter 3.
- SAML not valid on or after: Enter 3.
- SAML Initiator: Select OneLogin from the dropdown.
- SAML nameID format: Select Email from the dropdown.
- SAML Issuer Type: Select Specific from the dropdown.
- SAML signature element: Select Response from the dropdown.
- SAML encryption method: Select TRIPLEDES_CBC from the dropdown.
- SAML session NotOnOrAfter: Select 1440 from the dropdown.
- Click to select the checkboxes shown in the below screenshot.
Stage 3: Adding the parameters
The list of the Parameters is given below that need to be added. For each and every parameter flag the (Include in SAML assertion).
| IdP Attribute | SAML Response Attribute | Note |
|---|---|---|
| Company Name | Company Name | Click Macro and enter your company name |
| NameID value | ||
| first_name | First Name | |
| last_name | Last Name | |
| username | userPrincipalName |

NOTE You should create a custom attribute for the company Name in OneLogin as it is not provided by default in the application.
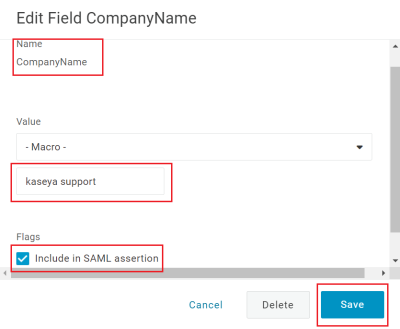
Enter the company name and save. You can find the company name by navigating to Login > Your profilename > My Settings. You will find the company name just below your profile picture.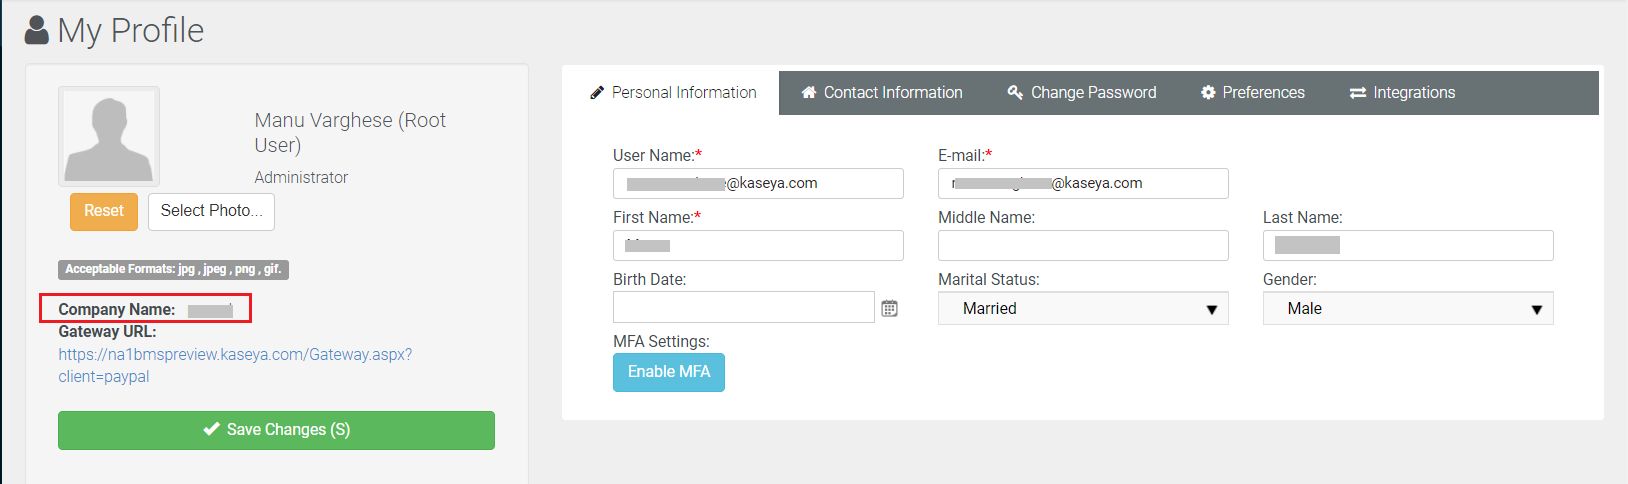
Stage 4: Enabling SAML 2.0
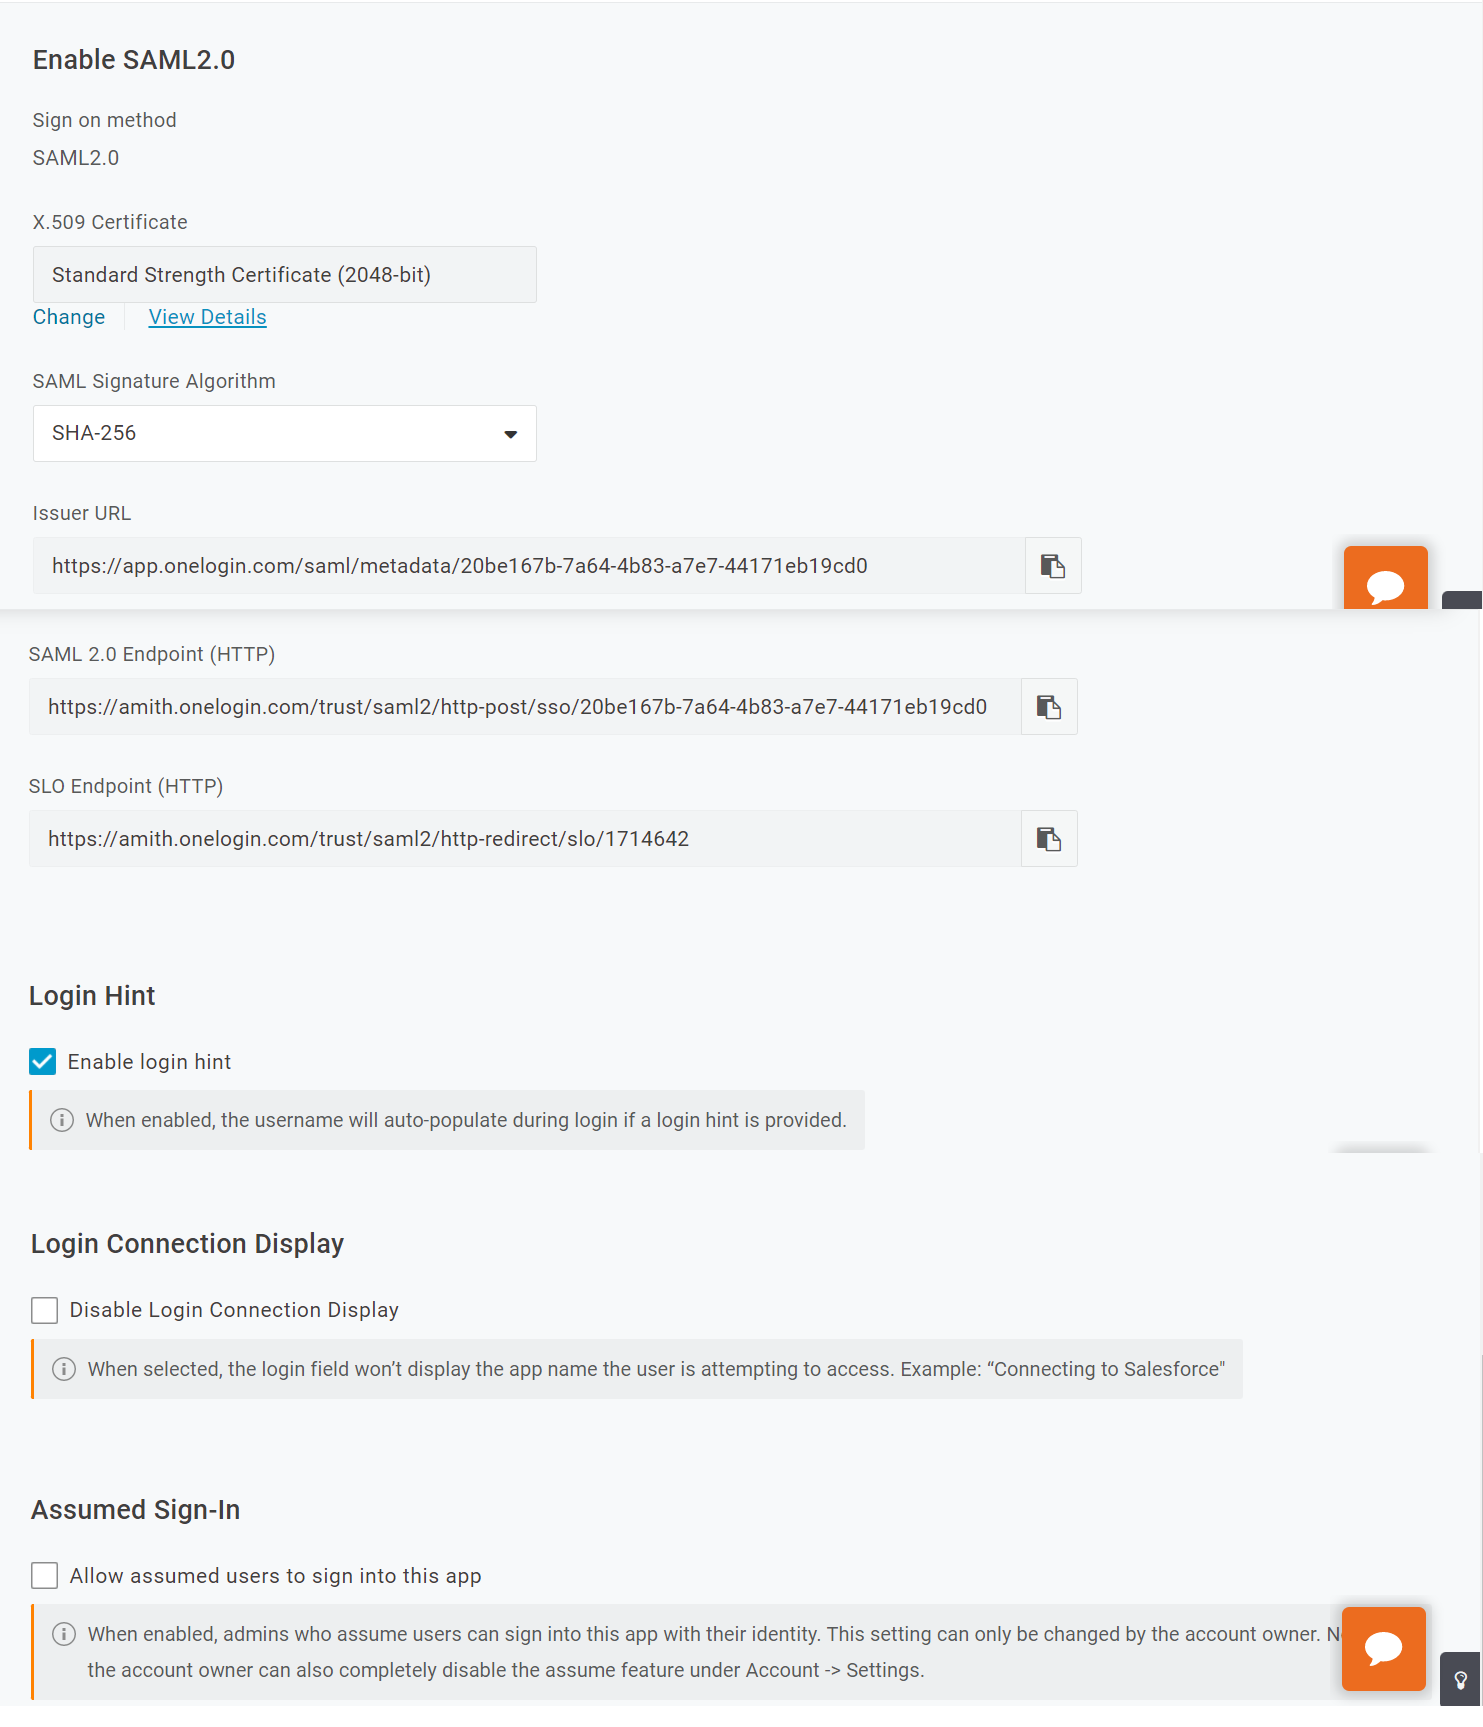
- Go to the SSO page.
- X.509 Certificate: Select Standard Strength Certificate (2048-bit).
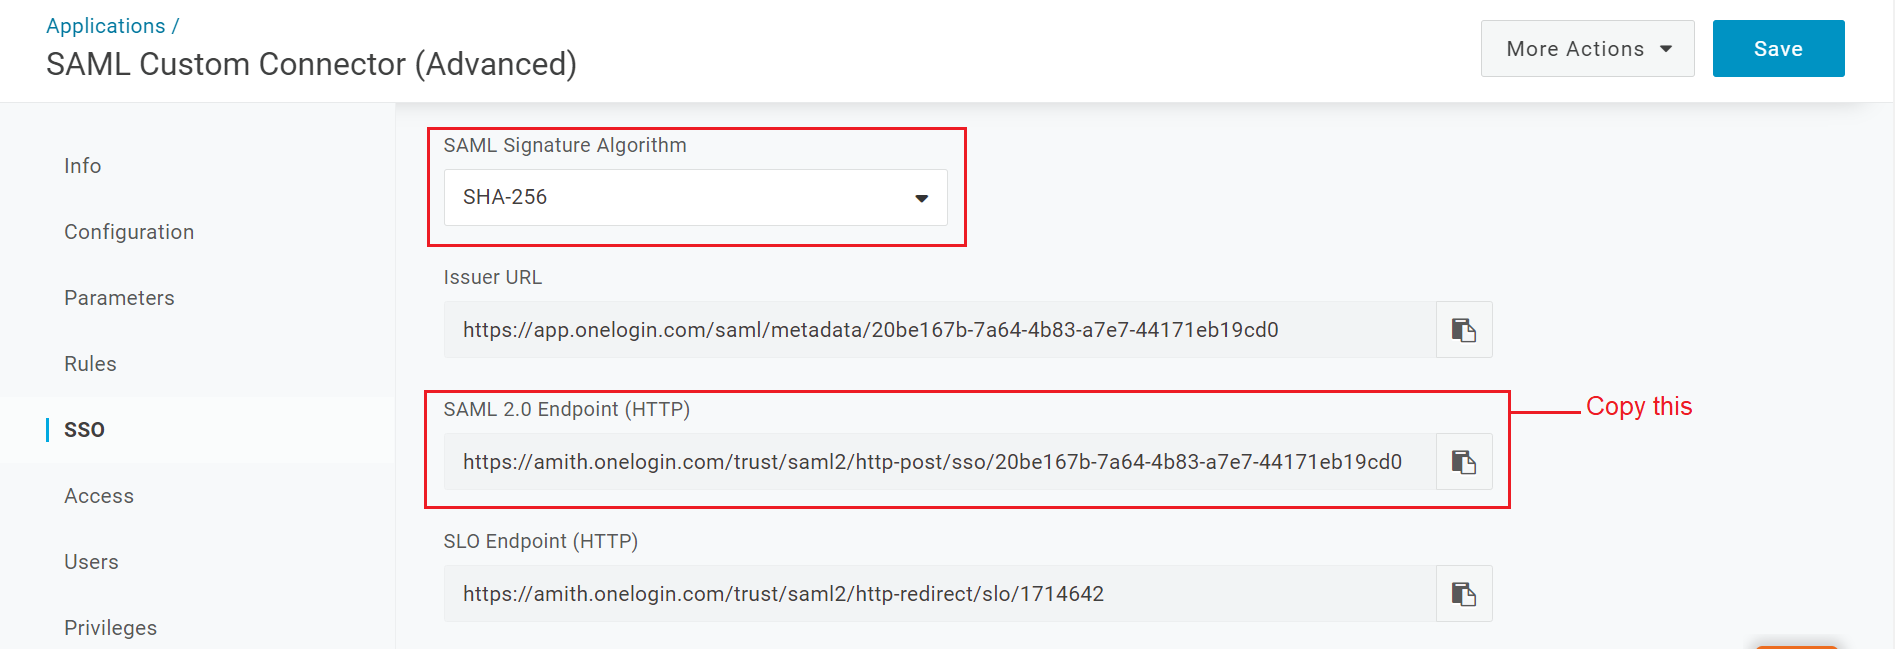
- SAML Signature Algorithm: Select SHA-256.
- Enable login hint: Click to select this checkbox.
- Right-click View Details and click Open link in a new tab.
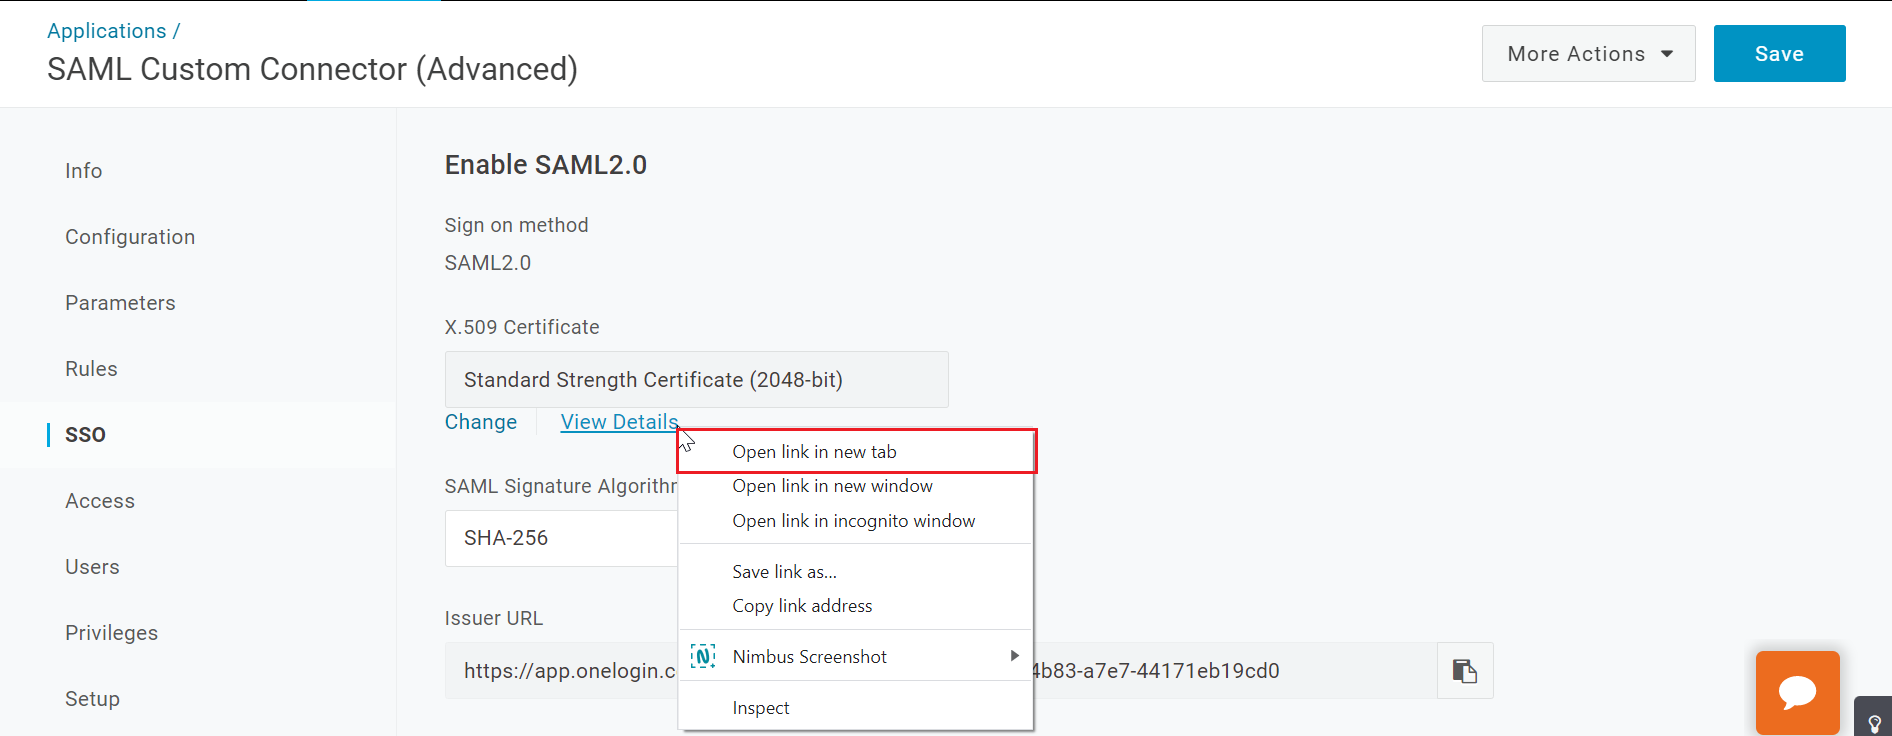
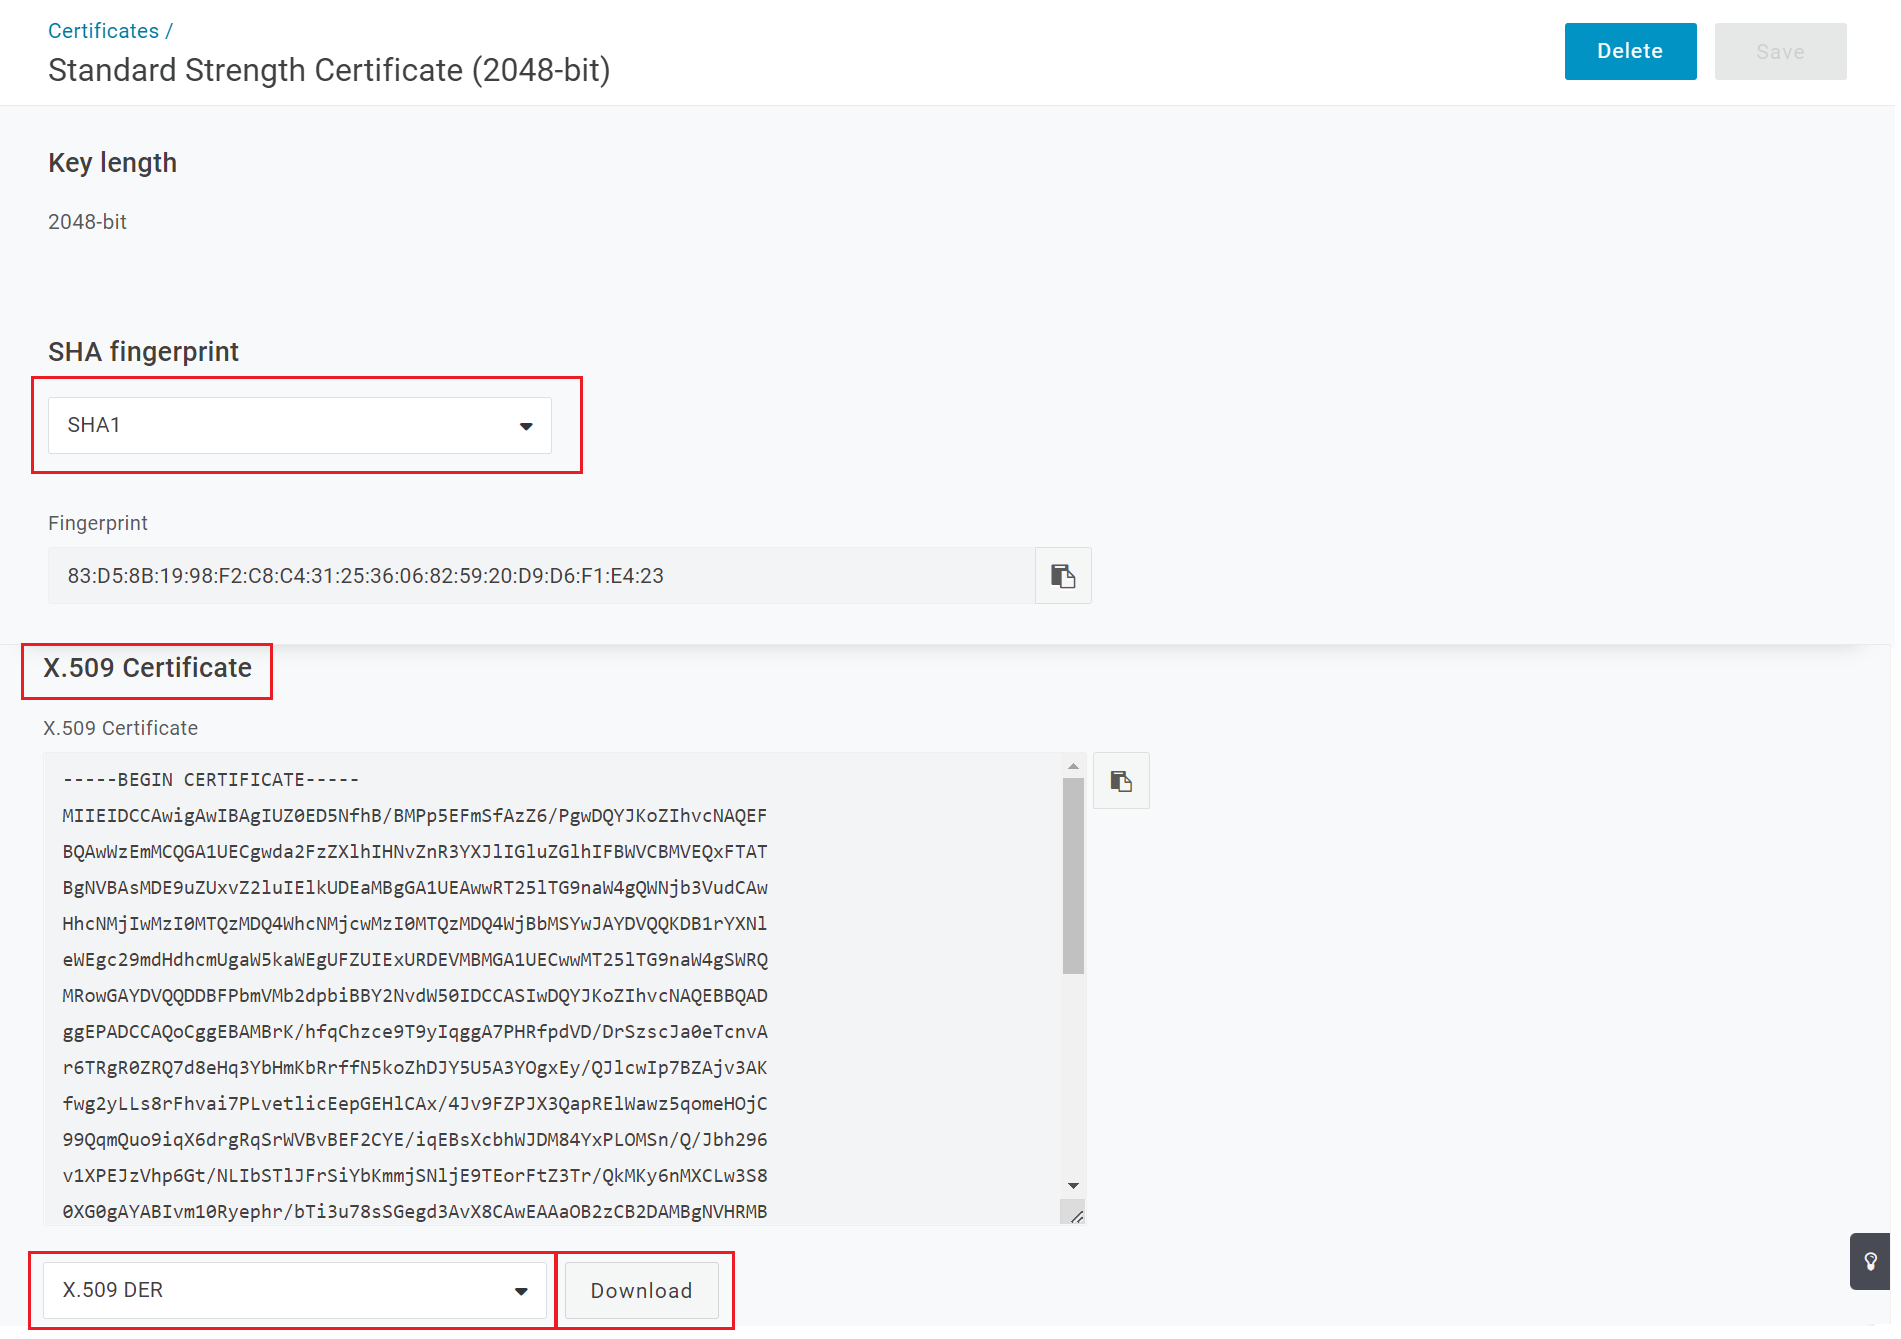
- Once you click Open link in the new tab, you will get the option to download the certificate. Select the SHA fingerprint as SHA1.
- Under X.509 Certificate section, select X.509 DER from the dropdown and click Download.
-
IMPORTANT Important:Once the file is downloaded, go to the Downloads folder, right-click and rename the file with .cer file extension in case it shows some other file extension.
- After the extension is changed, add the file to BMS.
- Select the file, click Upload Certificate and click Save.
Stage 5: Adding the user to the application
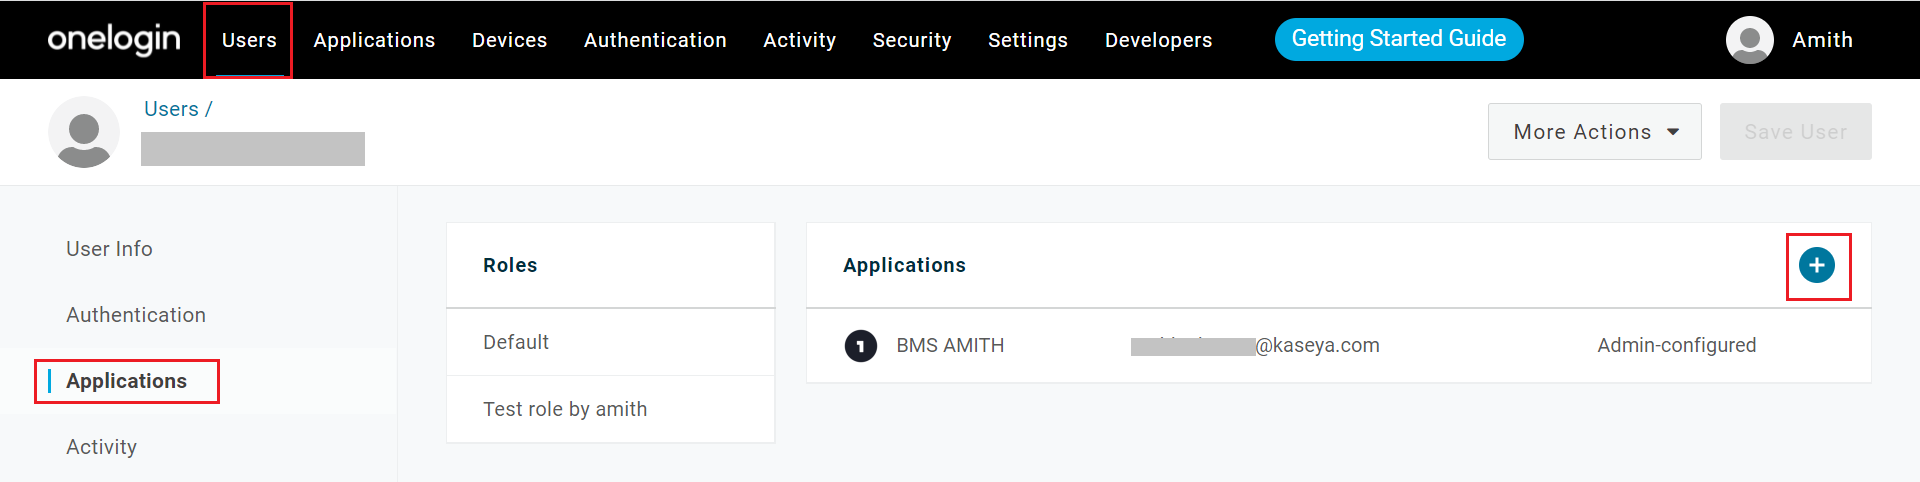
- Go back to OneLogin > Users menu on the top.
- Click New User.

- Once the user has been created, open the user, click the application inside the user profile, click + to add the application to the user.
Stage 6: Configuration on the BMS side
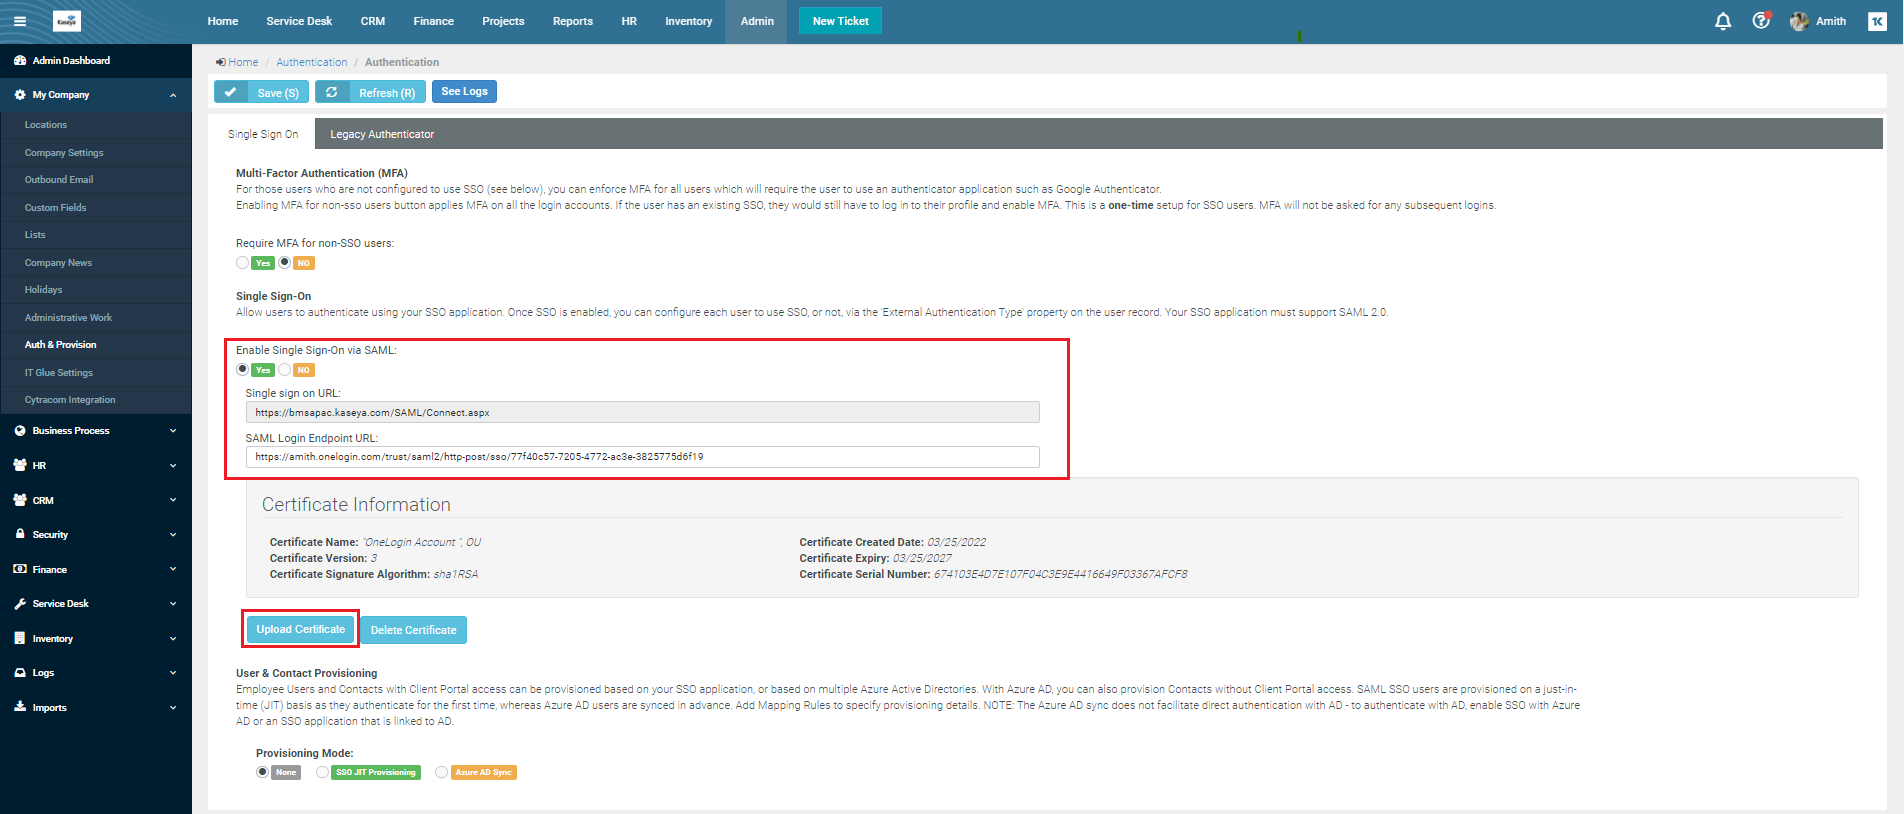
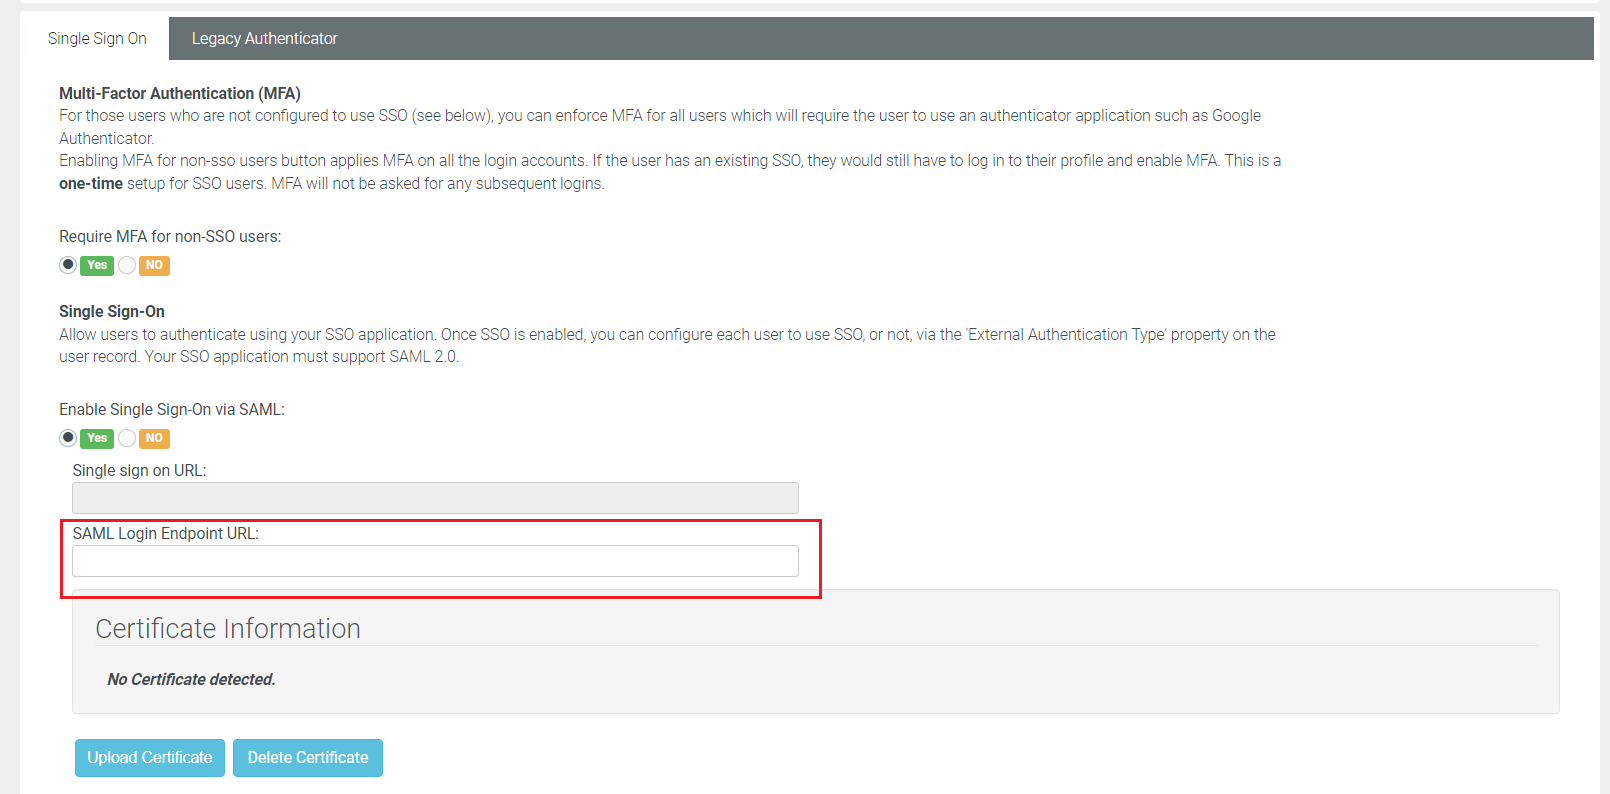
- After the Onelogin SAML application is created, copy the highlighted URL (single sign-on) from OneLogin and paste it into BMS by navigating to Admin > My Company > Auth & Provision > SAML Login Endpoint URL.
NOTE The user details added in the application should be the same for which the SSO is going to be enabled.
- Navigate to HR > Employees. Open the user profile and enable the SSO for the user.
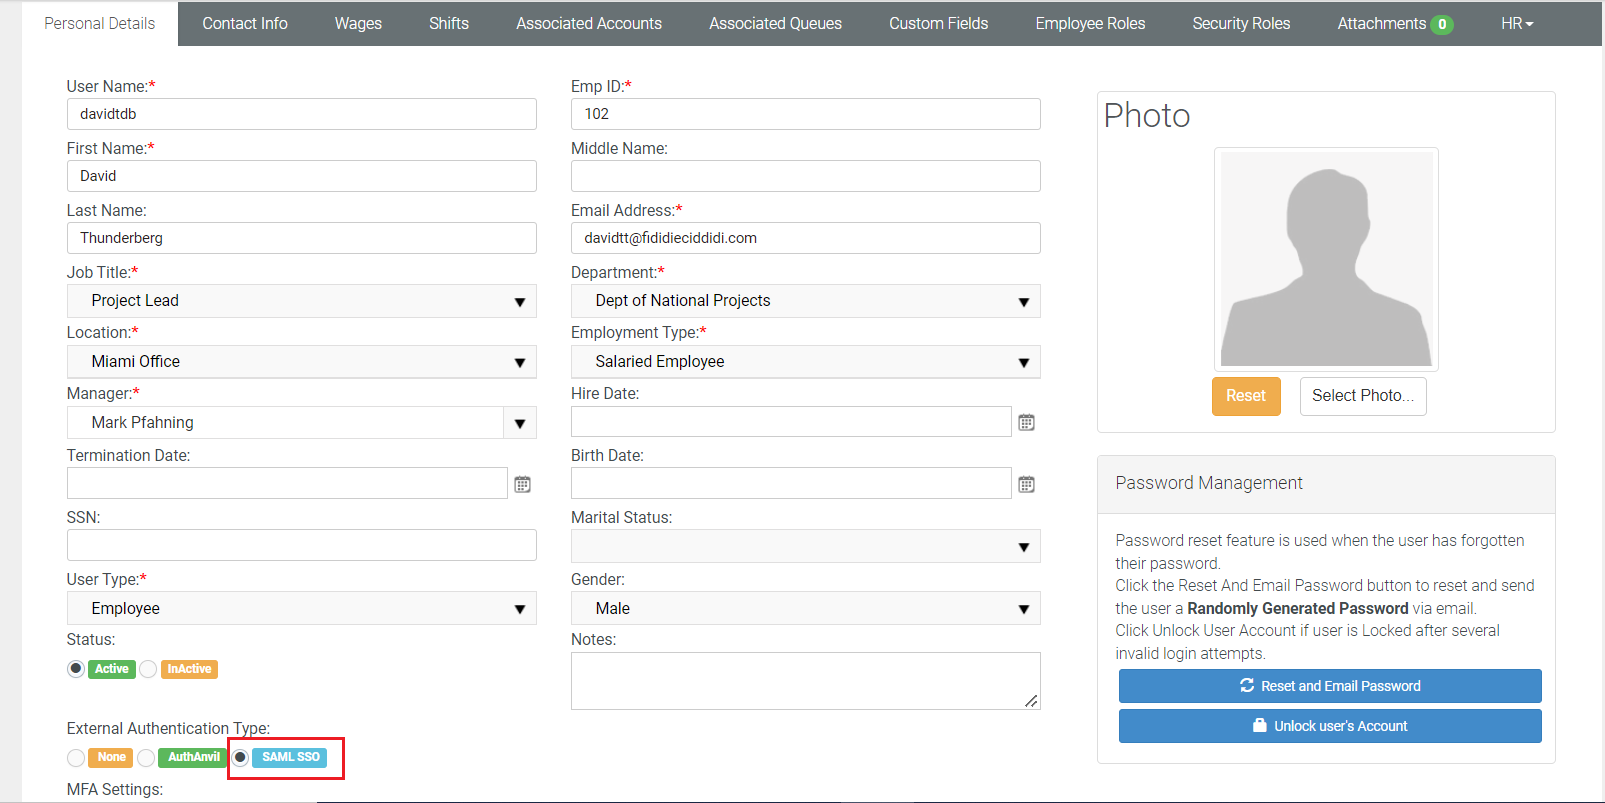
Once the SSO has been enabled for the user, the user will be able to log into the BMS instance now.


